You know those treats from childhood that just stick with you? For me, Homemade Strawberry Pop Tarts are wrapped up in cozy Sunday mornings, usually with a plate of warm, flaky pastries and the faintest scent of toasted crust hanging in the air. But store-bought? Let’s just say they never really cut it after you try the real thing—the filling is actually fruity, the pastry is melt-in-your-mouth, and you get that perfect balance of buttery dough and tangy strawberry. Not at all cloying or artificial, just genuinely bright, comforting, and a tiny bit messy when that glaze cracks under your teeth. If you’ve ever thought about giving a breakfast classic a homemade spin, this recipe will sweep you right back—only better.
When Pop Tarts Become a Morning Event
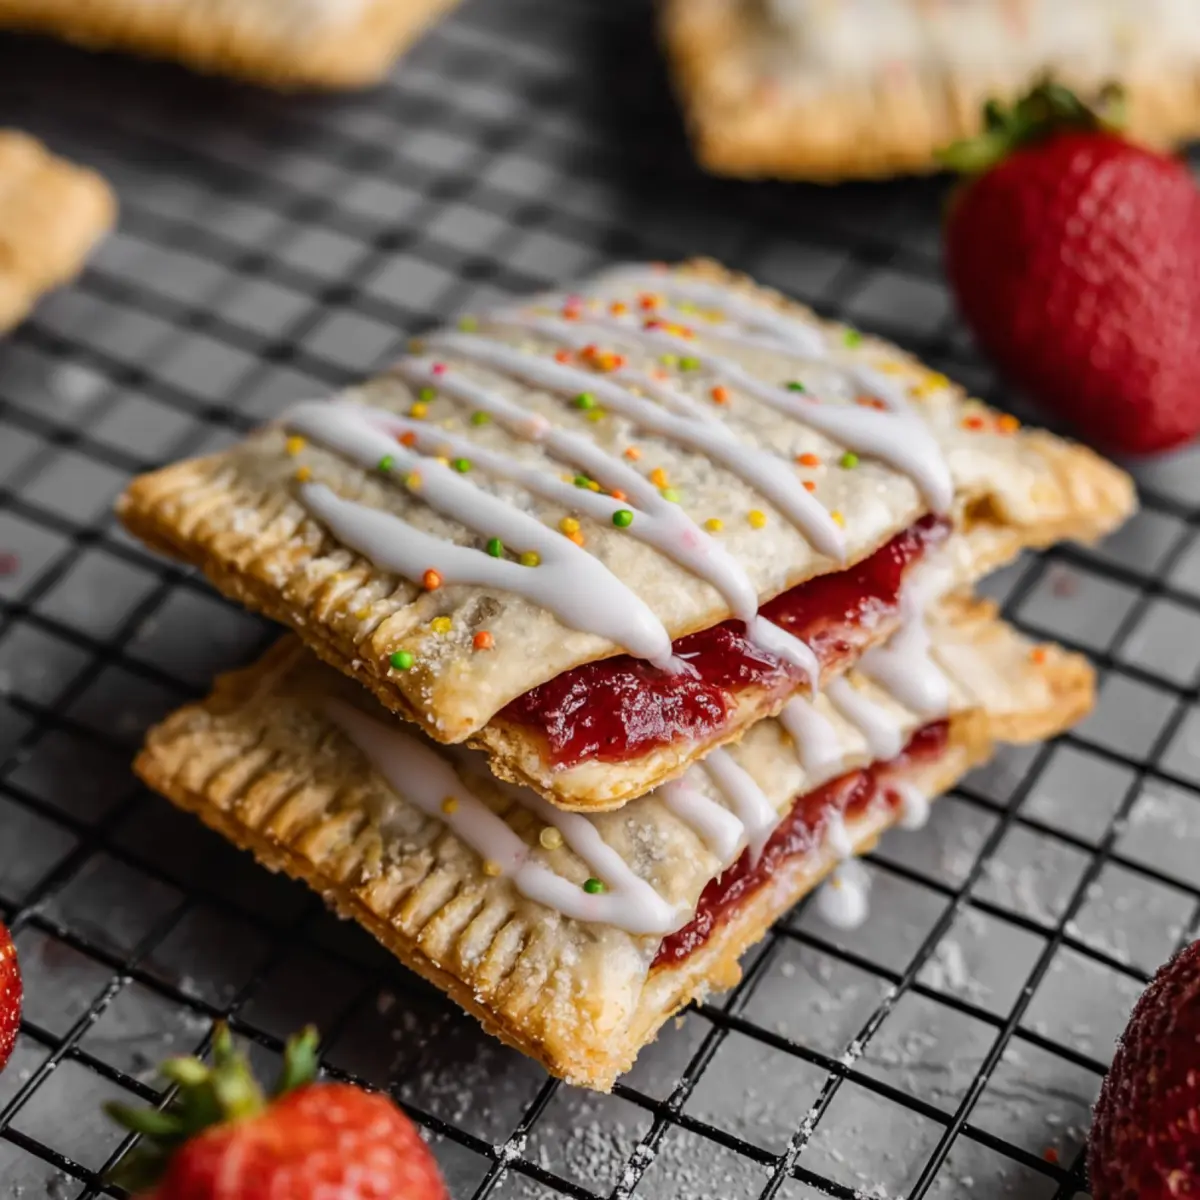
You roll out of bed, shuffle into the kitchen still half asleep, and—there they are. Homemade Strawberry Pop Tarts cooling on the wire rack, glaze just set but still shiny, inviting a swipe of your finger. They make an everyday morning feel lighter, as if the weekend showed up a little early. It’s that combination of buttery pastry and jammy strawberry center, a hit of nostalgia with grown-up flavor. Every homemade batch brings me right back to lazy breakfasts as a kid, only now I get to share them with friends over coffee or let the kids decorate with an avalanche of sprinkles. Honestly, they make any morning feel special, and even grey days feel just a notch brighter.
The Ingredients That Give These Pop Tarts Their Charm
- Flour – the backbone for that tender, flaky crust; opt for all-purpose so you get structure but still plenty of softness.
- Sugar – just enough to gently sweeten the dough and boost browning.
- Kosher salt – brings out depth and sharpens the flavors in every layer.
- Unsalted butter – needs to be cold and cubed, so it melts in pockets and gives that crisp, almost croissant-like bite.
- Cold water – helps bind the dough without making it tough—temperature really matters here.
- Strawberries – I use whatever looks juiciest, whether fresh or thawed from frozen; what matters is their flavor, not perfection.
- Honey – sweetens and adds a bit of floral warmth to the filling without being overpowering.
- Lemon juice – sharpens up the strawberry flavor and keeps things vibrant.
- Egg yolk – brushed around the borders for that golden seal when baking.
- Powdered sugar – forms the glossy glaze you drizzle over the finished pop tarts.
- Milk – thins out the glaze just enough, making it spreadable but still opaque.
See the recipe card below for the full list of ingredients and measurements.
How the Magic Unfolds in These Homemade Strawberry Pop Tarts
Making these treats is more of an experience than a chore, with small rituals you’ll come to love. Start by pulsing together the flour, salt, sugar, and cold butter in a food processor. You want those bits of butter to show—pea-sized is perfect—since they’ll turn into flakes later. Trickle in your cold water just until things start to hold together; if you squeeze a handful and it sticks without crumbling, that’s your cue to stop. Don’t overwork it; gentle is best. Form it into a rectangle, wrap, and let it rest in the fridge. That wait is always the hardest part but it’s worth it.
While the dough chills, shift to your strawberry filling—a small act of cooking alchemy. Puree strawberries with honey and lemon, then strain. You simmer this bright mixture until it turns glossy, thick, and fragrant—think of it as the scent you’d bottle if you could. The mixture should hold its shape when pulled with a spatula, more jam than sauce. Once set aside to cool, the kitchen will hum with a sweet-fruity aroma that feels almost indulgent.
Preheat your oven, then dust your work surface and roll out the dough. It should be thin enough to fold but sturdy enough to hold filling—about 1/8-inch does it. Cut into rectangles, and give yourself a little grace if they’re not perfect clones; they’ll look rustic and homemade, which is the point. Dab that strawberry filling in the center of half the pieces, keeping a bare edge for sealing. Egg yolk acts like glue here, holding top and bottom together. Dock the surface (for drama and also to let steam escape). Sandwich and crimp all around with a fork—those little ridges are the best part. Into the oven they go, where the edges will turn golden, the bottoms crisp, and the scent will be pure bakery bliss.
While they cool, whisk together powdered sugar and milk to get a thick but spreadable glaze. I like to let the pop tarts cool just a bit so the glaze sits on top rather than melting off. The final touch? Sprinkles, if you’re feeling whimsical, or maybe a few shards of freeze-dried berries for an extra grown-up finish.
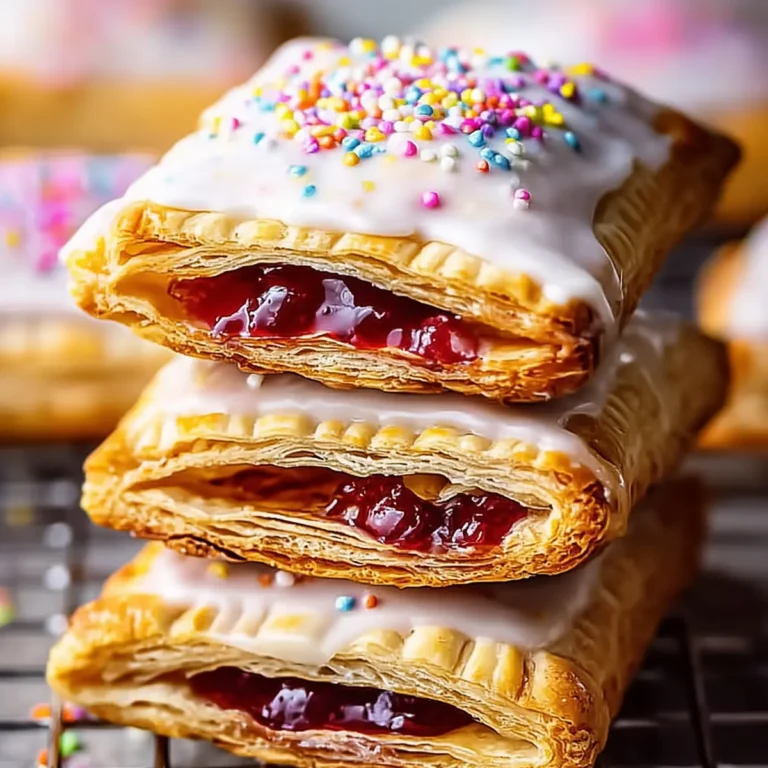
What Every Bite Reveals, Inside and Out
It’s tough to capture the magic of that first bite, but I’ll try. The crust is flaky and crisp, with a buttery snap around the edges and a delicate, melt-away texture at the center. There’s the gentle crack of the glaze on top—thin, almost glassy, sweet but not cloying—just before your teeth sink through layers of pastry. And then the jam punches through, bright and pure, with strawberry flavor that’s sharp and real, no hint of artificial. The filling stays slightly gooey, never runny or too thick. It’s nostalgia and homemade comfort in one messy, finger-licking bite. Whether you’re devouring one still slightly warm or sneaking an extra later in the day, that pop of berry and butter is unmistakable.
The Details That Make or Break a Pop Tart
This isn’t a recipe to rush—and honestly, that’s its charm. Let the dough rest long enough for maximum flakiness. Use cold butter (really, don’t take shortcuts here) and avoid overmixing, or the crust will lose its magic. Be generous but not reckless with the filling—you want it thick, not oozing out from every seam. When sealing, press with confidence: if you’re too gentle, the filling might escape; too hard, and the dough may tear.
Want to switch things up? Try swapping half the strawberries for raspberries, or use a little vanilla paste in the filling for a subtle twist. If you’re low on honey, maple syrup will bring warmth and complexity. Gluten-free flour blends can work if you’re careful with moisture. For a classic look, rainbow sprinkles are always a win, but thin-sliced almonds or dried petals give an elegant touch.
If you’re making these ahead, they hold up several days at room temperature (sealed tight, no fridge required for peak texture). Reheat gently in a toaster or oven, never the microwave—that way you keep that crisp edge. To freeze, skip the glaze until after defrosting. Glaze and decorate just before serving for the freshest look.
Serving These Pop Tarts: When and How They Steal the Show
These pop tarts don’t need a special occasion—though it’s wild how quickly they can turn regular moments into small celebrations. I love them alongside strong coffee as a breakfast treat, but they easily moonlight as dessert with a scoop of ice cream. Wrap one up for picnics, bake an extra tray for birthdays, or let kids decorate them for a weekend project. The truth is, their homemade look and bright filling make them just as welcome at a brunch spread as they are on a rainy afternoon with a good book.
If you want to please a crowd, set up a “decorate your own” pop tart bar with bowls of different glazes and toppings—the messier, the better. Leftovers make truly next-level lunchbox surprises, and you’ll probably catch yourself reaching for seconds (or thirds).
FAQs about Homemade Strawberry Pop Tarts
Can Homemade Strawberry Pop Tarts be frozen?
Yes, you can freeze pop tarts before glazing. Lay the baked (but unglazed) pastries in a single layer and freeze until firm, then store in a sealed bag for up to two months. Thaw at room temperature or warm briefly in the oven before applying glaze and serving.
What’s the best way to reheat Homemade Strawberry Pop Tarts?
For best texture, reheat pop tarts in a preheated oven or toaster until just warmed through. The microwave is quick, but you’ll lose that signature flaky crunch. Always add glaze after reheating, not before, to keep things fresh.
Can I use a different fruit for the filling?
Absolutely—you can swap strawberries for raspberries, blueberries, or even a mix of fruits. Just make sure to adjust the sweetness and cook the filling down to a thick, jammy consistency, so it doesn’t run or leak from the pastry.
How long do Homemade Strawberry Pop Tarts keep at room temperature?
Stored in an airtight container, pop tarts stay fresh for about three days at room temperature. If you want them to last longer, you can freeze them without glaze and add the topping fresh when ready to enjoy.
Homemade Strawberry Pop Tarts are a love letter to the classics, but with all the real flavors and textures you crave as an adult. I can’t help but feel a little burst of kid-like excitement just seeing them lined up on a baker’s rack, glaze shimmering and strawberry scent hanging in the air. There’s something special about making them from scratch—the process, the mess, the anticipation as they cool. Whether you serve them for breakfast, dessert, or sneak them straight from the tray, these pop tarts turn even the most ordinary day into a small celebration. Trust me, you’ll want to make enough for those inevitable second helpings.
More Delicious Recipes
- Homemade Brown Sugar Cinnamon Pop Tarts: If you love the nostalgic pastry, these sugar and cinnamon-filled pop tarts are a delicious variation to try.
- Homemade Blueberry Pop Tarts: For a fruity twist, these blueberry pop tarts offer a delightful filling with a similar flaky crust.
- Protein Pop Tarts with Strawberry Jam and Vanilla Glaze: These healthier pop tarts combine the beloved strawberry flavor with a protein boost perfect for breakfast.
Homemade Strawberry Pop Tarts
Equipment
- food processor
Ingredients
Ingredients
- 2 1/2 cups all-purpose flour
- 4 teaspoons sugar
- 2 teaspoons kosher salt
- 1 cup unsalted butter (2 sticks), chilled and cubed
- 1/2 cup cold water
- 16 oz strawberries (fresh or frozen – thaw if frozen) (~450g)
- 3 tablespoons honey
- 2 teaspoons lemon juice
- 1 egg yolk
- 1/2-1 cup powdered sugar
- 1-2 tablespoons milk
Instructions
Instructions
- In a food processor, pulse together flour, salt, sugar, and butter a few times, until the butter pieces are about the size of peas. Stream in the water, pulsing as you go.
- Move the dough to a bowl or lightly floured surface and gently knead into a ball – be careful not to overwork the dough. Wrap in plastic wrap and shape it into a rectangle that's about 1/2" thick. Place the dough in the refrigerator to chill for 2 hours.
- While the dough chills, blend your strawberries, honey, and lemon and strain through a fine mesh sieve directly into a saucepan to remove the seeds.
- Cook over medium heat for 20-25 minutes, until the strawberry mixture is reduced to the point where you can scrape the bottom of the pan and the jam takes a little while to run back together again. Move to a bowl to cool.
- Preheat oven to 300˚F and line a sheet pan with parchment paper.
- Divide your dough in half and roll into a roughly 14 x 14" square on a floured surface. You should just barely be able to see the lines of your silpat or work surface through your dough, which should be about 1/8" thick. Make sure your surface is well floured, and sprinkle some flour on the dough before rolling.
- Cut the dough into roughly 3.5 x 4.75" rectangles. You'll need to two for each pop tart. Combine your scrap dough and roll out again to minimize waste.
- Spoon about a tablespoon of filling into each pop tart, then spread into a thin layer, leaving about 1/3" around the border. Beat an egg yolk and brush around the border of the jam. Dock the tops of your pop tarts with a skewer or a fork, then place over the bottom, and press down and then crimp the sides.
- Bake for 30-35 minutes. They should be very lightly browned when you take them out, and the bottoms browned slightly.
- Whisk together powdered sugar and milk until a thick glaze forms. Let pop tarts cool, then spread ~1 tbsp glaze on each pop tart and top with sprinkles.