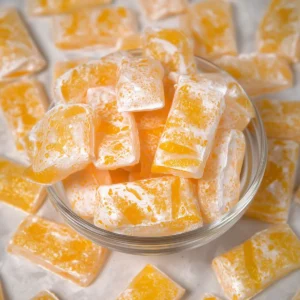
You know that late afternoon slump, when you crave just a little something bright and sweet? I always reach for lemon candies in times like that—a burst of citrus does wonders when your energy drops. Making your own Lemon Drops Hard Candy at home couldn’t be simpler, and let me tell you, the flavor is just as nostalgic and zippy as anything from the corner store.
There’s something irresistibly old-fashioned about these little yellow gems. Their crackle as you suck on one, the way they slowly melt into sweet-tart oblivion—honestly, it’s classic candy at its finest. Plus, if you’re the sort who likes tweaking your sweets, you can dial up the tang or keep them pure and mellow, with or without citric acid.
You’re just a pantry raid and a little stovetop magic away from a stash of cheerful, lemony sunshine. Let’s get those hands sticky.

What Makes These Lemon Drops Hard Candy a Classic Treat
Talk about nostalgia—Lemon Drops Hard Candy is like bottling a slice of sunshine. They’re bright, cheerful, and manage to be both sweet and just tart enough to keep you coming back for more. Unlike store-bought candies, homemade lemon drops let you control the flavor. Want a gentle citrus hug? Go lighter on the lemon oil. Prefer a sharp pucker? Add an extra drop, or toss in a dash of citric acid.
This recipe also gives you a little hands-on time in the kitchen, which I find oddly calming. Pulling and shaping that shiny, golden syrup into gleaming candies is part science, part fun. Best of all, they last for weeks tucked inside a tin—though at my house, they seem to disappear in record time.
Lemon candies aren’t just for solo snacking, either. Bring a jar to a picnic or package them up for holiday gifts, and watch them vanish. If you’ve been missing that old-school sour kick or simply want a new kitchen project, these homemade lemon drops might be your next obsession.
Lemon Drops Hard Candy Ingredients Unwrapped
- sugar: gives the hard candy its structure and classic sweetness.
- Water: helps dissolve the sugar and gives the syrup the right texture when simmered down.
- Natural lemon oil: delivers a pure, bright citrus punch that you just can’t fake.
- Cream of tartar: keeps the candy from crystallizing, so everything stays beautifully clear.
- Yellow gel food coloring: adds that cheery, sunny color kids (and grown-ups) expect from lemon candy.
- Citric acid (optional): bumps up the pucker and brings an extra-tangy finish.
- Confectioner’s sugar: coats the finished drops so they don’t stick together and adds a delicate sweet dusting.
- Vegetable oil or nonstick spray: used for greasing your kitchen scissors to keep things from sticking during cutting.
See the recipe card below for the full list of ingredients and measurements.
Swapping Ingredients for Your Dream Lemon Drops
Missing an ingredient or want to customize your lemon drop experience? No worries. If you don’t have natural lemon oil, try lemon extract for a lighter, more subtle flavor, though the kick won’t be quite as strong. Prefer a different hue? Orange or green gel coloring can switch up the vibe without altering the taste.
If citric acid is off-limits, simply leave it out; you’ll get a sweet, smooth candy rather than a tangy one. Don’t have cream of tartar? A splash of lemon juice can sometimes do in a pinch, though it won’t be as effective at preventing crystals. And if you’re avoiding cornstarch that’s sometimes in confectioner’s sugar, try dusting your candies with unsweetened coconut or even a bit of arrowroot powder.
From Syrup to Sunny Candy: Step-by-Step
Making Lemon Drops Hard Candy does take a little attention, but it’s worth every minute when you finally get to taste that perfect tart-sweet blend. Here’s how it all comes together:
- Prep your work surface with a silicone mat for easy candy handling. Lightly grease your kitchen scissors with oil or nonstick spray, so nothing sticks at the crucial moment.
- Set aside a bowl of confectioner’s sugar—the final stop for your candies before storage.
- In a saucepan, blend your sugar, water, and cream of tartar. Heat gently, stirring until the sugar turns clear and silken. As soon as the sugar has fully melted, stop stirring and latch your thermometer onto the pot.
- Let the syrup bubble away, brushing down the edges with a wet pastry brush now and then. You want a clear, golden syrup, free of graininess. Keep your eyes off the clock—watch for the right signs instead: the syrup thickens and looks glassy, and your thermometer will reach that “hard crack” stage.
- Once your syrup’s ready, pull it from the heat. Swirl in your lemon oil, drop in the yellow coloring, and, if you’re craving that pucker, add citric acid now. The scent alone is enough to make you dream of lemonade stands.
- Carefully pour the hot mixture onto your silicone mat. Protect your fingers with a set of cotton gloves topped with rubber gloves—safety first, always.
- Let the molten syrup rest, gently folding the mat over itself here and there. You’re looking for the mixture to come together without being runny, holding its shape but still pliable.
- Once you see those gorgeous fine streaks and the candy holds its own, fold the mass over itself a handful of times. You’ll feel it change in your hands as it thickens but stays workable.
- Pinch off a section and roll it into a thick tube. Working in sections keeps things manageable so your candy doesn’t set up before you’re done.
- Stretch a portion of the tube into a long rope—like making play dough snakes. Snip this into bite-sized pieces with your oiled scissors as you go, working quickly before it cools and turns brittle.
- Toss each finished piece straight into your waiting bowl of confectioner’s sugar, coating well so the candies stay separate and glossy.
- Repeat with any remaining candy, always working in small batches and leaving the rest in a covered mound on the mat so it stays warm and pliable. Once finished, store the lemon drops in an airtight container, ready for whenever a citrus craving strikes.
Candy-Making Tips, Tricks, and Shortcuts
If you’re new to homemade candy, here’s what will make your lemon drops come out gorgeously every single time. Keep all your tools ready before you start—the moment that syrup is ready, speed matters! Gloves are a must for handling hot sugar; double up with cotton underneath and rubber on top so you can shape the candy while it’s still pliable and not scorch your fingers.
Work in batches, and don’t try to pull all the syrup at once—resting sections off to the side under a towel helps keep them workable. If the candy starts setting before you’re done cutting, use the tip of your scissors to carefully break it apart.
When tossing lemon drops in confectioner’s sugar, don’t worry if some of it looks a little uneven—those slightly rustic, flour-dusted candies are just as lovely as perfect factory ones. For long-term storage, keep your candies in a sealed jar at room temperature, out of direct sun; they’ll stay fresh much longer than you can probably resist them.
Pairings, Variations, and Serving Ideas
Homemade Lemon Drops Hard Candy is a treat all on its own, but if you want to serve or gift them in style, there are plenty of creative ways to enjoy them. Drop a couple in your next cup of herbal tea and watch them dissolve into a lemony swirl—perfect for fighting off a spring chill. They’re also wonderful sprinkled into lemony desserts or as decorations atop cupcakes.
For a fun spin, try shaping the soft candy into tiny balls instead of classic drop shapes, or experiment with other citrus oils like lime or orange. You could even roll the finished candies lightly in powdered freeze-dried raspberries for a pretty pink sour shell (and an extra zing).
If you need to prep ahead, these candies last ages when stored properly—which makes them ideal for holiday gifts, party favors, or a secret snack stash. Want to stash them away longer? Stick them in the freezer (sealed, of course), and they’ll be just as good when you dig them out for a rainy day.
FAQs about Lemon Drops Hard Candy
Will my lemon drops get hard enough if I skip the citric acid?
Yes, they’ll still firm up nicely even if you don’t use citric acid. Citric acid mainly adds tartness, not hardness; your candy will be just sweet and lemony without the extra tang.
How do I keep my homemade lemon drops candy from getting sticky?
Roll the finished drops thoroughly in confectioner’s sugar after cutting them. This coating reduces stickiness and helps the candies stay separate—even after a few weeks in an airtight jar.
Can I use lemon juice instead of lemon oil for flavor?
Lemon juice won’t pack as much punch as lemon oil and can affect the texture. For the most vibrant citrus flavor, lemon oil is best, but in a pinch, lemon extract will work if you want a more subtle note.
Why did my hard candy turn cloudy instead of clear?
Cloudiness usually means some sugar crystallized during cooking. Make sure to brush the pan’s sides with water and avoid stirring after the sugar dissolves to keep things crystal clear.
Final Thoughts on Lemon Drops Hard Candy
Homemade Lemon Drops Hard Candy brings together old-school charm and unbeatable lemony brightness. These candies look gorgeous in a glass jar, taste like summer in every bite, and store beautifully whether you’re gifting or keeping them all to yourself.
If you love sweets with a punchy citrus edge, there’s really nothing like making your own. Once you get your first batch under your belt, I bet it won’t be the last time you let a little lemon drop joy brighten your day.
More Delicious Recipes
- Lemon Truffles: These truffles bring a creamy lemon flavor that perfectly complements the zesty notes of the lemon drops.
- Butter Mints: If you enjoy making sweets, these mints offer a delightful, melt-in-your-mouth experience similar to candy-making.
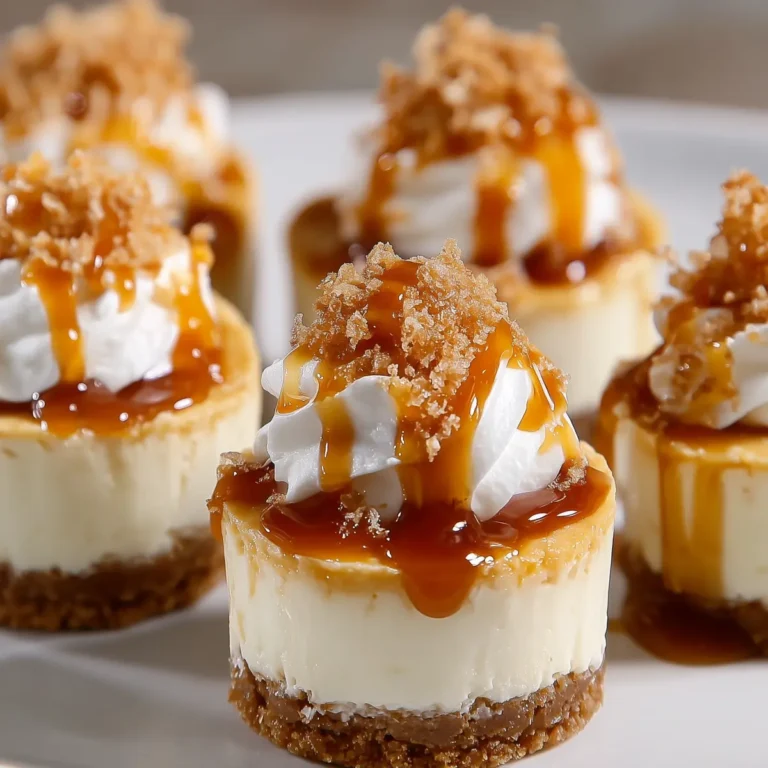
- No-Bake Oreo Cheesecake Bites: A fun candy-inspired treat that’s easy to make and perfect for satisfying your sweet tooth.
Lemon Drops Hard Candy
Equipment
- silicone baking mat
- kitchen shears
- medium saucepan
- candy thermometer
- wet pastry brush
- cotton gloves
- rubber gloves
Ingredients
Ingredients
- 200 grams granulated sugar (1 cup)
- 120 milliliters water (1/2 cup)
- 1 teaspoon natural lemon oil
- 1/4 teaspoon cream of tartar
- 2-3 drops yellow gel food coloring or as desired
- 1 teaspoon citric acid (optional)
- 70 grams confectioner's sugar (1/2 cup), in a large bowl
- Vegetable oil or nonstick spray for coating kitchen scissors
Instructions
Instructions
- Cover countertop or work surface with a silicone baking mat.
- Spray kitchen shears with vegetable oil or nonstick cooking spray.
- Place the confectioners sugar in a small bowl. Set aside.
- In a medium saucepan, combine granulated sugar, water, and cream of tartar. Cook over medium heat, stirring occasionally until the sugar dissolves.
- Once sugar has dissolved, stop stirring* and add a candy thermometer to monitor the temperature (or keep a hand-held digital thermometer nearby!)
- Continue cooking the sugar mixture until it reaches 300° F / 149° C on a candy thermometer, periodically brushing down the sides of the pan with a wet pastry brush to prevent crystallization. Cooking the sugar will take about 15 minutes, so be patient!
- Remove saucepan from heat. Stir in lemon oil, yellow food coloring, and citric acid if using.
- Pour hot sugar mixture onto prepared silicone mat. Put on your cotton gloves, then add a pair of rubber gloves over top.
- Allow the sugar syrup to rest on the mat, periodically folding the mat over itself. As you do this, you’ll start to see the sugar sticking to itself and forming a mass, rather than immediately running back into a puddle.
- You’ll know the sugar is ready to pull when it comes together into a ball, and does not lose its shape. It will still be hot and easily pliable, but no longer “gooey” or runny.
- With gloved hands, fold the sugar over itself several times (it will start to feel thicker and slightly less pliable, and you’ll see fine white streaks in the sugar). Do this 4-5 times, then pull it into a short, thick tube.
- With your hands, pull a section of the tube into a long rope, about 1/2-inch in diameter. Use kitchen shears to cut the rope into 3/4-inch pieces.
- Note: Work in small sections rather than pulling all of the sugar at once. Otherwise, the sugar will cool and become difficult to cut (or might even shatter when you try to cut it!) Pull the ropes in 12-inch increments, and keep the remaining sugar in a large mass/tube until ready to pull.
- Add the lemon drop candy pieces to the bowl confectioner’s sugar, and toss to coat.
- Store lemon drop candy in an airtight container at room temperature for up to six weeks.