It started as a kitchen dare—could I actually make a show-stopping batch of Homemade Kool-Aid Licorice using just a few familiar pantry staples? The answer is yes, and the results are just as chewy and punchy as you’d expect, with those eye-popping colors and bold flavors that practically shout summer fun. If you love getting a little hands-on, or have kids who can’t resist a good kitchen project, this is the kind of treat that sparks pure joy. Sticky fingers, grins stained bright red or blue—it’s pure nostalgia in every bite.
What I love most is how the cool, sweet-tart scent of Kool-Aid drifts up as everything starts to bubble on the stove. You know you’re making something truly fun when even the process feels like childhood in a saucepan. And best of all, you control the flavors, the shapes, even the texture—no mystery ingredients, no plastic wrap, just your own playful twist on a classic candy counter favorite.

Why Homemade Kool-Aid Licorice Is a Must-Try
There’s something downright magical about creating your own retro candy from scratch, and Homemade Kool-Aid Licorice makes you feel like a candymaker for the day (without any intimidating equipment or fancy techniques). These licorice strips are loaded with intense, fruity flavor and that classic, bouncy-chewy texture—just the kind of bite that takes you right back to playground snack swapping or summer camp care packages.
Making licorice at home means you control the flavors (cherry? grape? lime? yes, yes, yes), the sweetness, and the shape. Want wide, ribbon-like pieces? Go for it. Prefer those classic thin strips? Cut away! You won’t find any artificial aftertaste here—only pure fun and flavor from every slice. Plus, this is easily one of the most affordable ways to whip up a batch of brightly colored treats to share. Trust me: kids, teens, and grown-up Kool-Aid lovers all agree, they disappear fast.
What You’ll Need for These Kool-Aid Licorice Treats
Every great kitchen adventure starts with simple, trusty ingredients, and this Homemade Kool-Aid Licorice is no different. Here’s a breakdown of what gives these chewy bites their signature flavor and fun:
- Sugar – Provides all the sweetness and the perfect chewy structure you expect in classic licorice.
- Water – The carrier that helps everything dissolve and allows the flavors to bloom as you heat the mixture.
- Kool-Aid (any flavor) – The real star here. Go wild with your favorite—tart cherry, vibrant grape, bold lemon-lime—each one packs a bright punch of fruity color and taste.
- Unflavored gelatin – This is what transforms the liquid into that signature bouncy, chewy candy texture. Make sure it’s unflavored so your licorice gets all the color and zip from the Kool-Aid, not from the gelatin.
- Citric acid (optional) – If you love that tangy, sour edge (think sour belts), a sprinkle of citric acid really amps up the tartness. Totally optional but lots of fun if you like a sour kick.
See the recipe card below for the full list of ingredients and measurements.
Step-by-Step: How to Make Homemade Kool-Aid Licorice
Making your own licorice at home might sound a little wild, but the steps are really straightforward—and honestly, pretty fun. Here’s how to turn a handful of pantry staples into bouncy Homemade Kool-Aid Licorice:
- Get things bubbling: Pour the sugar and water into a sturdy saucepan and set it over medium heat. Stir gently as everything comes together. You’re looking for the mixture to start boiling and for all the sugar to fully dissolve—it’ll turn clear, sweet, and just a little glossy.
- Infuse with flavor: Sprinkle in the Kool-Aid powder and the unflavored gelatin. Grab a whisk and stir like you mean it, making sure the gelatin has completely disappeared and the whole mixture is smooth, vividly colored, and thickening up a little bit.
- Add the tang (if you want): For a bright, sour punch, toss in some citric acid and whisk to blend. If you’re all about the classic sweetness, you can skip this or add just a pinch, tasting as you go.
- Set it up: Lightly grease a rectangular pan (nothing fancy, just a quick swipe of oil or neutral spray), then pour in the hot liquid candy. Tip the pan back and forth if you need to, just to get an even layer. Slide the pan into your fridge and let it chill until it’s completely set and firm to the touch. No peeking, give it plenty of time for the texture to develop.
- Slice and serve: Once firm, run a butter knife around the edges and lift the jelly slab onto a clean cutting board. Use a sharp knife or a pizza wheel to carve long, skinny strips or chunkier “ribbons”—whatever makes you happiest. Peel up a piece, take a bite, and enjoy that chewy, bright burst of flavor you made all by yourself.
Tricks and Tips for Foolproof Homemade Licorice
There’s so much room to play with Homemade Kool-Aid Licorice, but over the years I’ve nailed a few secrets to get candy-shop-worthy results every time. If your mixture isn’t setting up firm enough in the fridge, it usually means the gelatin needed a little longer to dissolve—give it an extra stir and make sure there are no clumps before pouring it in the pan.
Chilling is key: don’t rush it! If you’re impatient (honestly, who isn’t when candy’s involved?), popping the pan into the coldest part of your fridge helps speed things along, but don’t freeze it or you’ll end up with weird, icy spots instead of chewy goodness. When it’s time to slice, spray your knife lightly or run it under warm water to keep things from sticking and get those super clean licorice strips.
Homemade licorice keeps best stored in an airtight container in the fridge, especially if your kitchen runs warm. If you want it a bit firmer for travel or a party platter, leave it uncovered in the fridge for a few extra minutes to “air dry” just slightly—the edges will set up a touch more for that iconic licorice chew.
Fun Ways to Serve and Variations for Kool-Aid Licorice
The best thing about Homemade Kool-Aid Licorice is how easy it is to get creative. Make several batches in different flavors (think layers of cherry, grape, orange, and blue raspberry) and stack them for a rainbow effect. Want to make sour belts instead? Cut the set licorice into long, flat strips and toss with a bit of citric acid and sugar. Try using fun cookie cutters for heart shapes, stars, or even your initials—these make hilarious party favors or birthday treats.
For a grown-up twist, serve these at your next retro game night or movie marathon, paired with salty popcorn or a bowl of tangy fruit. Stash some in lunchboxes, pack them into jars for last-minute gifts, or keep a few stashed in the fridge for sweet-tooth emergencies.
If you’re skipping gelatin for dietary reasons, look for plant-based options like agar-agar. Just follow package directions, and remember: the set might be a bit firmer, but the flavor is still all yours. Want something even bolder? Blend two different Kool-Aid flavors for a fun, swirled effect.
FAQs about Homemade Kool-Aid Licorice
How long does Homemade Kool-Aid Licorice last in the fridge?
When stored in an airtight container in the refrigerator, Homemade Kool-Aid Licorice will stay chewy and fresh for about a week. The colors and flavors hold up well, but for best texture, try to enjoy within five to seven days.
Can I freeze Homemade Kool-Aid Licorice for later?
I don’t recommend freezing these licorice strips. The gelatin tends to get weepy and grainy from thawing, so you’ll lose that perfect chew. Instead, make a batch when you’re ready to enjoy and stash leftovers in the fridge for a grab-and-go sweet fix.
What’s the best way to make these licorice strips extra sour or use different flavors?
For a truly sour licorice, add extra citric acid to your mixture and toss finished strips in a blend of citric acid and sugar. Want new flavors? Use any Kool-Aid variety, or blend two flavors before adding to the candy base. Each one gives a new twist and color, so it’s easy to customize for any craving.
Is it possible to make Homemade Kool-Aid Licorice vegan or without gelatin?
Yes! Swap the unflavored gelatin for agar-agar powder or a similar plant-based gelling agent. You may need to experiment with the ratio, as the set and chewiness can be different, but you’ll still get vibrant, flavorful vegan licorice to share.
Whether you’re reliving those last-day-of-school celebrations or just craving that unmistakable chewy-sweet bite, Homemade Kool-Aid Licorice is pure kitchen fun. With bright bursts of color, big flavor, and a texture that’s spot-on, these strips are meant for sharing, gifting, or sneaking straight from the fridge late at night. Grab your favorite Kool-Aid packet and the simplest ingredients—you’ll have a batch of homemade happiness in no time.
More Delicious Recipes
- Irresistible Grilled Irish Potatoes: These flavorful potatoes are a fun side to any summer gathering, just like the homemade Kool-Aid licorice.
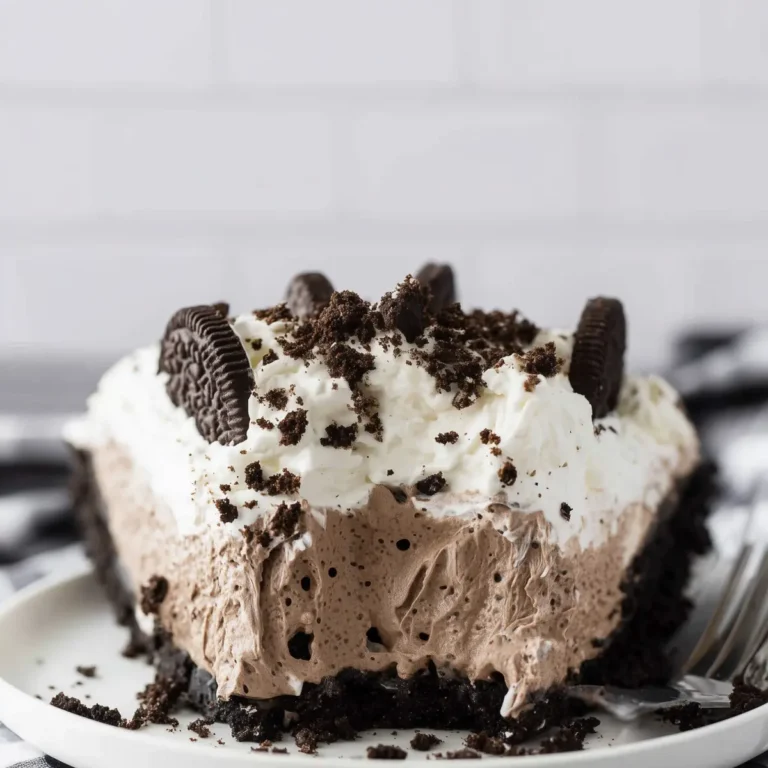
- No-Bake Oreo Cheesecake Bites: A sweet treat that’s perfect for a fun kitchen project, similar to making your colorful licorice.
- Honey Lavender White Chocolate Truffles: Indulge in these delightful truffles, which offer a creative twist similar to the playful nature of your Kool-Aid candy.
Homemade Kool-Aid Licorice
Equipment
- Saucepan
- Rectangular Pan
Ingredients
Ingredients
- 1 cup Granulated Sugar
- 1.5 cups Water
- 1 package Kool-Aid (Any flavor)
- 1.5 oz Unflavored Gelatin (6 packets)
- 1 teaspoon Citric Acid (optional, for sourness)
Instructions
Instructions
- In a saucepan, combine sugar and water. Bring to a boil over medium heat, stirring until sugar is dissolved.
- Add Kool-Aid and gelatin. Stir constantly until gelatin is completely dissolved.
- If desired, stir in citric acid for extra sourness.
- Pour mixture into a lightly greased 9x13 inch pan. Let set in the refrigerator for at least 2 hours, or until firm.
- Cut into strips or desired shapes and enjoy!