
You know those lazy, playful pre-holiday afternoons when it feels like everyone’s in the mood for a treat—something cool and chocolatey, but still fun and festive? That’s exactly where these St. Patrick’s Day Mint Blossom Cookies fit in. The air fills with a sweet peppermint aroma, and the sight of green sparkling sugar makes them impossible not to steal, even before they’re cool.
These cookies are the perfect answer when you want an easy, crowd-pleasing dessert that looks like you went all-out—without actually spending forever in the kitchen. Chilled dough means thick, soft cookies; rolling them in colored sugar gives them a little leprechaun-worthy dazzle. And that glossy dark chocolate piece in the center? It’s what ties everything together for the ultimate peppermint-chocolate combo.
Why St. Patrick’s Day Mint Blossom Cookies Are a Must-Bake
If you’re hunting for something that screams “St. Patrick’s Day” but actually delivers on taste, these mint blossom cookies have your back. They bring all the fun—tempting green sparkle, chocolate kisses melting into a cool, buttery sugar cookie—without needing a degree in pastry.
The peppermint flavor keeps things fresh and never overpowering, even with the richness of the chocolate center. Plus, they’ll look festive on any holiday table, whether you’re throwing a party or just setting out an after-school snack for your family. Short on time or baking confidence? No worries—the dough behaves, the steps are simple, and even beginner bakers will be proud of their results.
Kids love rolling these in colored sugar, but honestly, grown-ups might fight for the last one too. They’re that good.
The Magical Ingredients Behind Mint Blossom Cookies
- Flour: gives the cookies structure and that perfect, tender bite.
- Baking soda & baking powder: help with leavening for a slightly puffed, soft finish.
- Fine sea salt: balances the sweet and brings out the peppermint and chocolate flavor.
- Unsalted butter: the backbone for richness and classic cookie flavor; don’t swap for oil if you want that old-school bakery texture.
- Granulated sugar & light brown sugar: create a fine crumb and a hint of caramel warmth.
- Eggs: hold everything together and give that plush, cakey chew you want.
- Peppermint extract: delivers a refreshing, not-too-intense icy coolness that plays perfectly with the chocolate.
- Vanilla extract: softens the mint and rounds out those deeper sweet notes.
- Green gel food coloring: totally optional, but it’ll make your cookies pop on the plate.
- Granulated sugar for rolling: gives each cookie a crackly, sweet edge.
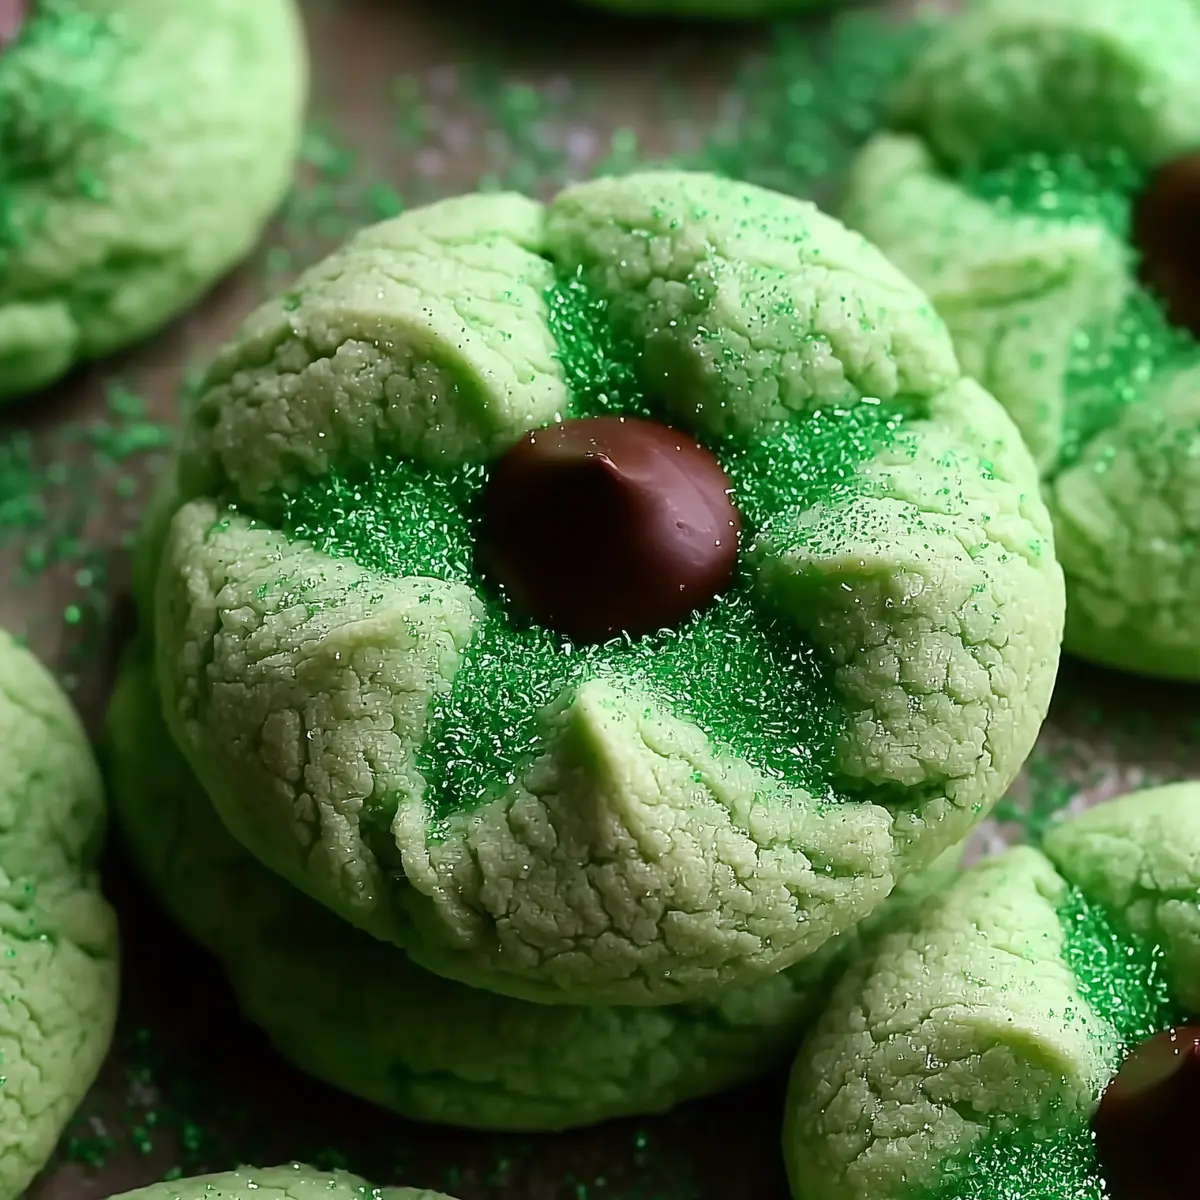
- Green sanding sugar or colored sugar: the finishing festive touch—crunchy, sparkly, and totally St. Paddy’s.
- Dark chocolate kisses or chocolate candies: give that iconic blossom effect—rich, glossy, and slightly melty in the center.
See the recipe card below for the full list of ingredients and measurements.
Simple Swaps and Substitutions
All out of peppermint extract? Try spearmint or even a combo of mint and almond for a bakery-style twist. You can switch dark chocolate kisses for milk or white chocolate if you like things sweeter—or even use a square of a luxe chocolate bar instead.
Don’t want food coloring? Leave it out. The cookies will stay pale golden, but still taste just as magical. Dairy-free butter blocks work in a pinch, though you’ll get a slightly different crumb. And if you need gluten-free cookies, choose your favorite 1:1 baking blend in place of the standard flour (just be careful with texture). No green sanding sugar? Just use regular granulated sugar, or make homemade colored sugar by mixing green gel food dye into a small bowl of sugar until it’s the right hue.
Baking Up the Perfect St. Patrick’s Day Mint Blossom Cookies
- Start by whisking together your dry ingredients—this means getting the flour, baking soda, baking powder, and salt evenly distributed. This step sets you up for cookies that rise and bake consistently.
- Next, cream your butter until smooth and then add the sugars. Beat until you see the mixture turn pale and fluffy, like soft buttercream. This adds just the right amount of air for that dreamy, soft bite.
- Mix in the eggs, one at a time, along with the peppermint and vanilla. If you’re using food coloring, add it now and work it in until your dough is a shade of green that brings out your inner leprechaun.
- Gently fold the dry stuff into the wet, just until you’ve got a smooth dough. Don’t overmix, or you’ll lose that melt-in-your-mouth magic.
- Let your dough take a rest in the fridge. This step is key—chilling means your cookies stay thick and hold their festive shape instead of spreading out into thin pancakes.
- When you’re ready, roll balls of dough in your palm, then give each one a roll through green sugar for that sparkle. Place the dough balls on your lined baking sheet with breathing room between them.
- Bake until the edges dry and set, and you get a faint golden tinge. Don’t wait for them to get too brown—they’ll keep cooking a little as they cool.
- Right after they come out, gently press a chocolate kiss into the center of each cookie. You’ll feel the warm cookie give way, hugging the chocolate in like a little present.
- Let the cookies cool completely before moving them to a plate. The chocolate tops set up as they cool, so don’t rush or you’ll risk a melty mess.
Cookie Baking Tips Everyone Needs
One of the biggest secrets? Chilled dough is your friend; it makes the difference between bakery-style, thick cookies and flat, sad ones. If you can, chill overnight—your flavor will deepen too.
Always use room-temperature butter and eggs. Cold butter won’t cream right and could leave you with dense cookies instead of soft, cakey ones. If you only have standard chocolate instead of candies made for blossoms, break it into chunks and press them in quickly so they melt and gloss over just enough.
Store cooled cookies in a tight container so they stay soft for days. If they do start to dry, a slice of sandwich bread in the tin keeps them fresh longer. And don’t skip the parchment on your baking sheet—it’s cleanup and nonstick insurance in one.
What to Serve With Your Mint Blossom Cookies
Mint blossom cookies really shine alongside a steamy mug of cocoa or creamy Irish coffee if you’re feeling seasonal. A cold glass of milk is classic, but a scoop of vanilla or mint chip ice cream turns them into an over-the-top treat.
Want to get fancy? Drizzle melted chocolate over the cookies before the chocolate centers cool fully or sprinkle mini shamrock sprinkles for extra cheer. For variation, try swapping the chocolate center for caramel candies or using different colored sanding sugars to match your party color scheme.
Need to get ahead? These cookies freeze beautifully. Just roll and freeze the dough balls—pull out and bake as needed, then add the chocolate once they’re baked. You can also freeze fully baked (unstacked) cookies; thaw at room temp with the chocolate intact.
FAQs about St. Patrick’s Day Mint Blossom Cookies
Can I make these cookies ahead of time for a party?
Yes, you can prepare the dough in advance and refrigerate it for up to two days, or freeze dough balls for longer storage. Bake fresh on party day and add the chocolate after baking for the best look.
Will the chocolate center melt if I stack the cookies?
The chocolate sets fairly firm once the cookies cool completely, making stacking possible. For perfect, smudge-free results, use parchment paper between layers or let the cookies chill in the fridge before stacking.
Can I substitute other extracts for peppermint?
Yes, you can use other extracts like spearmint, almond, or vanilla, but the classic coolness of peppermint is what gives these cookies their signature St. Patrick’s Day twist.
How do I make these cookies gluten-free?
To make these cookies gluten-free, just swap in a 1:1 gluten-free baking flour blend for the regular flour. Expect a slightly different crumb, but all the flavor and fun will still be there.
Bringing It All Together
There’s something about St. Patrick’s Day Mint Blossom Cookies that just brings people together—whether you’re passing a plate at a family celebration or sneaking one solo with your afternoon coffee. Soft, minty, and topped with that bittersweet chocolate, these cookies are bound to disappear fast.
Give them a whirl this season, and you’ll see why they’re a new favorite: holiday-bright, utterly easy, totally irresistible. Here’s to sweet, green moments and sharing them with the ones you love.
More Delicious Recipes
- Red Velvet Blossoms Cookies: These cookies feature a fun, festive twist similar to the mint blossom cookies, with a delightful center that makes them perfect for celebrations.
- Candy Cane Cookies: Just like the mint blossom cookies, these holiday treats bring a sweet peppermint flavor that’s perfect for festive gatherings.
- Chocolate Chip Christmas Cookies: These classic cookies share a love for chocolate, making them another crowd-pleaser alongside your minty treats.

St. Patrick's Day Mint Blossom Cookies
Ingredients
Ingredients
- 2 3/4 cups all-purpose flour
- 1 tsp baking soda
- 1/2 tsp baking powder
- 1/2 tsp fine sea salt
- 1 cup unsalted butter, room temperature
- 1 cup granulated sugar
- 1/2 cup light brown sugar, packed
- 2 large eggs, room temperature
- 3/4 tsp pure peppermint extract
- 1 tsp pure vanilla extract
- green gel food coloring (optional)
- 1/2 cup granulated sugar (for rolling)
- green sanding sugar or colored sugar
- 48 pieces dark chocolate kisses or chocolate candies
Instructions
Instructions
- Whisk together flour, baking soda, baking powder, and salt in a medium bowl. Set aside.
- Cream butter until smooth, then add granulated sugar and brown sugar. Beat until light and fluffy.
- Add eggs one at a time, mixing well after each. Add peppermint extract and vanilla extract and mix briefly.
- If using, mix in green gel food coloring until evenly tinted.
- Gradually add dry ingredients to wet ingredients, mixing just until combined.
- Cover dough and refrigerate for at least 30 minutes to prevent spreading.
- Roll dough into 1-tablespoon balls and roll in green sugar until fully coated.
- Bake at 350°F (175°C) for 9–11 minutes until edges are set and lightly golden.
- Let cookies cool on the baking sheet for 2–3 minutes, then press one chocolate piece into the center of each cookie.
- Allow cookies to cool completely before transferring or storing.


