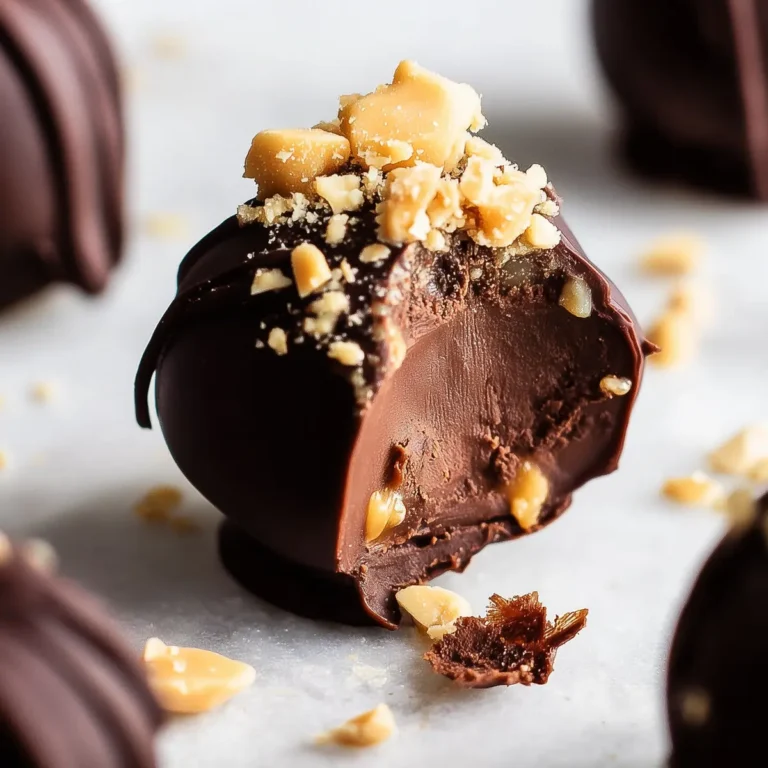
If you’re in the mood to impress with something bite-sized and decadent, these mini chocolate tarts will absolutely steal the show. Classic French in spirit but delightfully accessible, this recipe features a buttery shortcrust pastry and a rich chocolate ganache filling—simple, elegant, and shockingly easy to pull off with just a muffin pan. There’s something magical about the deep cocoa aroma wafting from the oven, and when you top these little gems with whipped cream and fresh fruit, it’s that perfect balance between fancy and fuss-free.
What truly sets these mini chocolate tarts apart is their melt-in-your-mouth pastry, silky chocolate center, and that pop of salt or fruit on top. Whether you’re planning for a dinner party, a thoughtful homemade gift, or just craving an indulgent chocolate fix, these tarts bring big flavor in a small package. I’ll always remember that first pop of ganache when I bit into one—irresistible!

Equipment to make easy mini chocolate tarts at home
- Muffin pan – The secret weapon for shaping those gorgeous mini tart shells perfectly every time.
- Electric mixer – Whips the butter and sugar into a fluffy, creamy base for the pastry and the whipped cream topping.
- Mixing bowls – For combining dough ingredients, melting chocolate, and prepping toppings.
- Plastic wrap – Essential for chilling the dough so it stays tender and easy to roll out.
- Rolling pin – Rolls out the shortcrust pastry evenly for thin, crisp crusts.
- Cookie cutter (round, scalloped) – Cuts the dough into neat circles that fit your muffin pan wells.
- Muffin liners – Used as a barrier for the baking weights, making tart shells perfectly shaped.
- Baking weights or uncooked rice – Prevents the dough from puffing up while baking.
- Piping bags – Makes filling the tart shells with ganache and topping with whipped cream simple and mess-free.
- Wire rack – Cools the tart shells evenly to keep them crisp.
Ingredients that make these tarts unforgettable
- butter – Gives the shortcrust its melt-in-your-mouth, tender texture.
- Powdered sugar – Sweetens and softens the pastry and whipped cream.
- Large egg – Adds richness and helps bind the dough for a smooth, workable crust.
- All-purpose flour – The structure behind those crisp, golden tart shells.
- Salt – Enhances every flavor in the crust and balances the sweetness.
- Dark or semi-sweet chocolate (roughly chopped) – The star of the show, creating a luscious, bittersweet ganache center.
- Heavy cream – The magic behind a silky ganache and billowy whipped cream topping.
- Whipping cream – Used for extra lightness and luxury in the topping, if desired.
- Vanilla extract – Rounds out the flavors in the whipped cream with soft, floral notes.
- Fresh strawberries (or other fresh fruits) – Bring a bright, tangy pop on top to cut through the chocolate richness.
- Flaky salt – A final sprinkle that intensifies the chocolate and adds crunch.
See the recipe card below for the full list of ingredients and measurements.
Step-by-step: How to craft mini chocolate tarts
- Stir together dry ingredients. In a medium bowl, mix the flour and salt until well combined. Set aside—you’ll be adding this to your butter mixture soon.
- Cream the butter and powdered sugar. In a large mixing bowl, use an electric mixer to beat the softened butter (listen for that soft slapping sound!) until creamy. Gradually add powdered sugar, beating until the mixture turns pale and fluffy.
- Beat in the egg. Add the egg to your butter-sugar mixture and mix until everything comes together into a smooth, thickened paste.
- Add flour mixture. With your mixer on low, add the flour and salt blend. Continue mixing until a soft, crumbly dough starts to form. The dough should clump easily in your hands but not be sticky.
- Shape and chill the dough. Turn the dough out onto a piece of plastic wrap and use your hands to press it into a disc. Wrap tightly and chill in the fridge for at least 2 hours, or overnight for best flavor and texture.
- Roll and cut. On a well-floured surface, roll out the dough to about 1/8 inch thick. Use your round scalloped cutter to cut out circles—the dough will feel cool and almost silky beneath your fingers.
- Press into muffin pan. Gently press each dough round into the wells of your muffin pan using your knuckle. Let the dough sink in to fill the space; patch any tears with scraps.
- Chill and preheat. Pop the whole pan in the fridge for 30 minutes, which keeps your crusts crisp and minimizes shrinkage. Meanwhile, preheat your oven to 175°C.
- Blind bake tart shells. Line each tart with a muffin liner and fill with baking weights or rice. Bake for 18–20 minutes, or until the edges are golden brown and the shells look dry and set. Let them cool for 5 minutes in the pan, then carefully transfer to a wire rack to cool completely. The pastry should feel fragile but sturdy.
- Prepare chocolate ganache. Place chopped chocolate in a heat-safe bowl. Heat heavy cream until it just begins to simmer (bubbles at the edges, but not boiling), then pour over the chocolate. Wait about 3 minutes.
- Stir until smooth. Gently stir the cream and chocolate together until every chunk melts and the ganache is glossy and thick. If you watch closely, it’ll transform from soupy to glossy in just a few stirs.
- Pipe ganache into shells. Let the ganache cool slightly—you want it pourable but not hot. Transfer to a piping bag and fill each tart shell about three-quarters full with silky ganache.
- Whip the cream. In a bowl, combine heavy (or whipping) cream, powdered sugar, and vanilla. Whip with an electric mixer on medium until firm peaks form. It should feel pillowy and hold shape when you lift the beaters.
- Pipe or garnish tarts. Pipe a generous dollop of whipped cream onto each tart, or top with slices of fresh strawberries or a sprinkle of flaky salt for a balanced finish.
Tips, troubleshooting, and common mistakes for mini chocolate tarts
- Tough crust? This usually happens if the dough was overworked or not chilled enough. Handle just until it comes together, and be patient with chilling time—no shortcuts!
- Pastry shrunk or tore in the pan? Always chill the shaped dough in the pan before baking. If you spot a crack, patch it with an extra scrap of dough—the shells are forgiving.
- Ganache grainy or split? High heat can cause chocolate to seize or separate. Pour just-simmered cream over chocolate and let it sit unmixed for several minutes before stirring gently. If there are lumps, microwave in 5–10 second intervals, stirring thoroughly after each.
- Whipped cream too runny? Keep your cream cold and be patient—beat until you see visible trails and soft peaks that hold their shape.
- Sticking shells? Let the tart shells cool and firm up in the pan before unmolding. Gently tilt each shell with your fingers, or use the tip of a butter knife along the edge if needed.
Pairing ideas and creative variations for these tarts
Mini chocolate tarts are showstoppers as is, but pairing and customizing them adds fun personality:
- Drinks: Pair with espresso, fresh coffee, or a robust black tea for contrast, or serve with a glass of red wine for adults.
- Fruit: Top with raspberries, blackberries, or mandarin segments for a bright, fresh finish. The tartness balances the rich chocolate filling beautifully.
- Festive touch: Add edible flowers, candied ginger, or pistachio crumbs for special occasions.
- Salty meets sweet: Sprinkle flaked sea salt or crushed pretzels for extra crunch and intrigue.
- Kid-friendly: Swap the dark chocolate for milk chocolate or white chocolate and top with colorful sprinkles.
- Grown-up twist: Add a tiny splash of liqueur like orange, coffee, or hazelnut to the ganache just before piping.
FAQs about Mini Chocolate Tarts
How should I store mini chocolate tarts to keep them fresh?
Store the mini chocolate tarts in an airtight container in the refrigerator. They’ll keep well for up to 3 days, maintaining that lovely tender crust and smooth ganache. If you’ve added whipped cream or fresh fruit, it’s best to add those just before serving for the freshest bite.
Can I freeze mini chocolate tarts?
Yes, you can freeze the tart shells (unfilled) once they’re completely cool—just wrap tightly and use within 1 month. For best results, fill with ganache after thawing so the centers stay smooth. Avoid freezing the whipped cream topping, as its texture may change.
What chocolate works best for the ganache filling in mini tarts?
Dark or semi-sweet chocolate gives the richest, deepest flavor for mini chocolate tarts. Go with a chocolate bar you love to eat straight—chop it up so it melts easily. Milk chocolate works if you want a sweeter result, but keep the cocoa content high for a truly luscious texture.
One last bite: Why these mini chocolate tarts wow every time
Every element in these mini chocolate tarts is crafted for pure pleasure—from the delicate snap of pastry, to the velvety ganache, to that hit of sweet berry or salty crunch on top. Bringing them together in just a muffin pan is a little kitchen magic that’s hard to resist. They’re fancy enough for a celebration, easy enough for weeknight cravings, and utterly unforgettable down to the very last crumb. Don’t be surprised if they disappear fast—grab one for yourself before they’re gone!
More Delicious Recipes
- Cocoa Marshmallow Cupcakes: These delightful cupcakes feature rich cocoa, perfect for satisfying your chocolate cravings just like the mini tarts.
- Tiramisu Chocolate Layer Cake: This indulgent cake combines layers of chocolate and coffee, akin to the luxe flavors of your chocolate tarts.
- Chocolate Chip Christmas Cookies: A classic treat, these cookies offer a chewy chocolate experience that complements the rich taste of your mini tarts.

Mini Chocolate Tarts
Equipment
- Muffin pan
- electric mixer
- Mixing bowls
- Plastic wrap
- Rolling Pin
- Cookie cutter (round, scalloped)
- Muffin liners
- Baking weights or uncooked rice
- Piping bags
- wire rack
Ingredients
Ingredients
- 170 g unsalted butter (softened to room temperature)
- 120 g powdered sugar
- 1 large egg (room temperature)
- 350 g all-purpose flour
- 1/2 teaspoon salt
- 300 g dark or semi-sweet chocolate (roughly chopped)
- 300 g heavy cream
- 200 g heavy cream or whipping cream
- 20 g powdered sugar
- 1 teaspoon vanilla extract
- fresh strawberries (or other fresh fruits)
- 1 tablespoon flaky salt
Instructions
Instructions
- Stir together dry ingredients: In a medium bowl, mix the flour and salt until well combined. Set aside—you’ll be adding this to your butter mixture soon.
- Cream the butter and powdered sugar: In a large mixing bowl, use an electric mixer to beat the softened butter (listen for that soft slapping sound!) until creamy. Gradually add powdered sugar, beating until the mixture turns pale and fluffy.
- Beat in the egg: Add the egg to your butter-sugar mixture and mix until everything comes together into a smooth, thickened paste.
- Add flour mixture: With your mixer on low, add the flour and salt blend. Continue mixing until a soft, crumbly dough starts to form. The dough should clump easily in your hands but not be sticky.
- Shape and chill the dough: Turn the dough out onto a piece of plastic wrap and use your hands to press it into a disc. Wrap tightly and chill in the fridge for at least 2 hours, or overnight for best flavor and texture.
- Roll and cut: On a well-floured surface, roll out the dough to about 1/8 inch thick. Use your round scalloped cutter to cut out circles—the dough will feel cool and almost silky beneath your fingers.
- Press into muffin pan: Gently press each dough round into the wells of your muffin pan using your knuckle. Let the dough sink in to fill the space; patch any tears with scraps.
- Chill and preheat: Pop the whole pan in the fridge for 30 minutes, which keeps your crusts crisp and minimizes shrinkage. Meanwhile, preheat your oven to 175°C.
- Blind bake tart shells: Line each tart with a muffin liner and fill with baking weights or rice. Bake for 18–20 minutes, or until the edges are golden brown and the shells look dry and set. Let them cool for 5 minutes in the pan, then carefully transfer to a wire rack to cool completely. The pastry should feel fragile but sturdy.
- Prepare chocolate ganache: Place chopped chocolate in a heat-safe bowl. Heat heavy cream until it just begins to simmer (bubbles at the edges, but not boiling), then pour over the chocolate. Wait about 3 minutes.
- Stir until smooth: Gently stir the cream and chocolate together until every chunk melts and the ganache is glossy and thick. If you watch closely, it’ll transform from soupy to glossy in just a few stirs.
- Pipe ganache into shells: Let the ganache cool slightly—you want it pourable but not hot. Transfer to a piping bag and fill each tart shell about three-quarters full with silky ganache.
- Whip the cream: In a bowl, combine heavy (or whipping) cream, powdered sugar, and vanilla. Whip with an electric mixer on medium until firm peaks form. It should feel pillowy and hold shape when you lift the beaters.
- Pipe or garnish tarts: Pipe a generous dollop of whipped cream onto each tart, or top with slices of fresh strawberries or a sprinkle of flaky salt for a balanced finish.