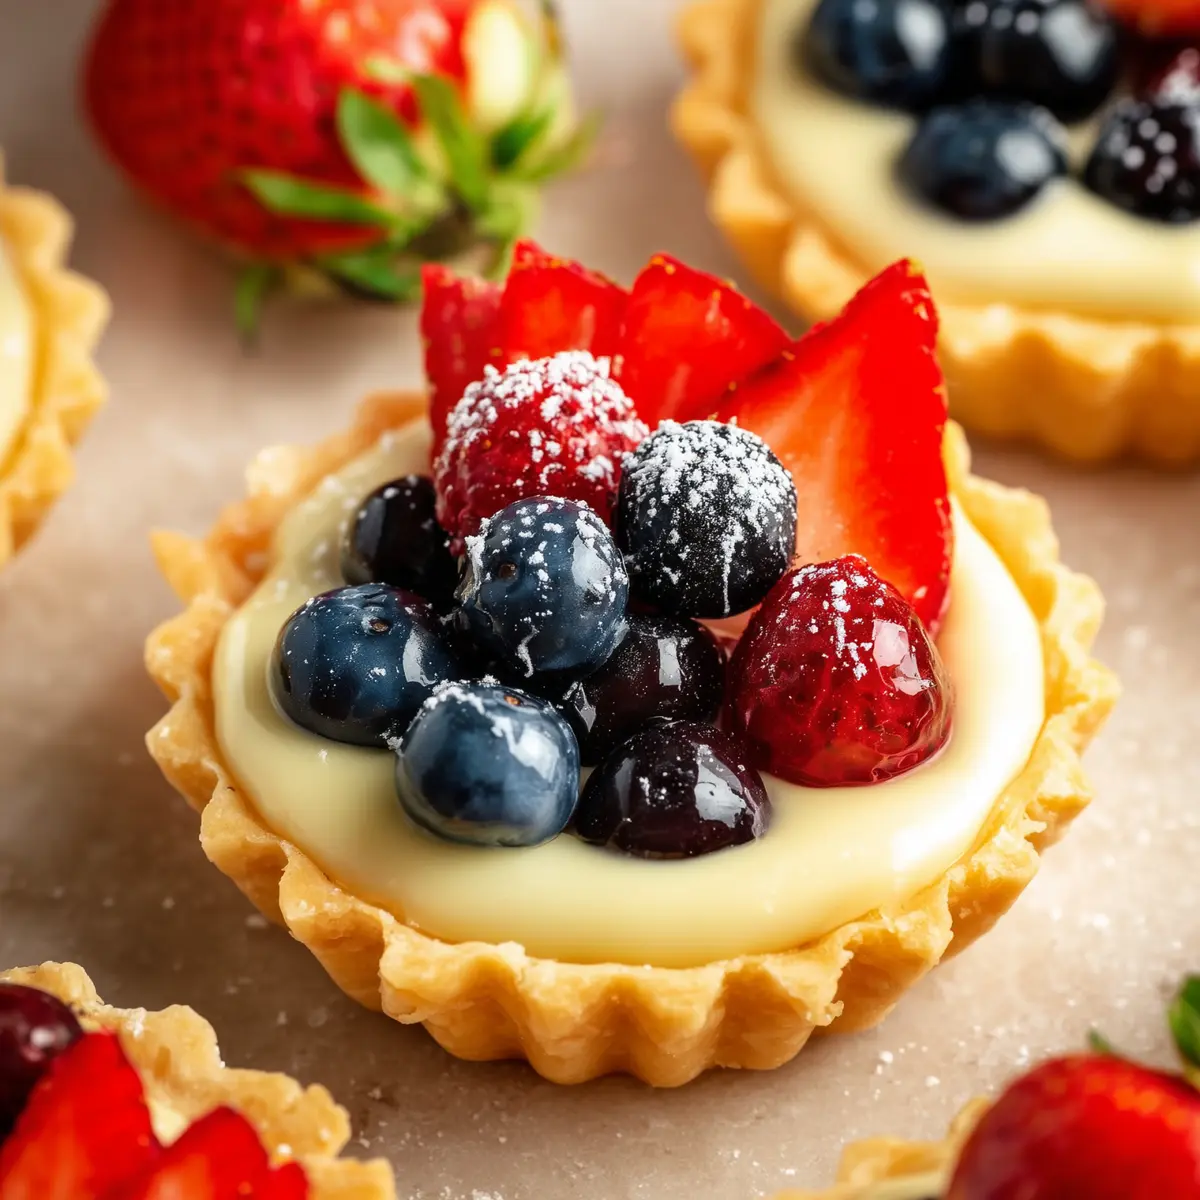
If you’ve got a craving for something that feels like a bakery treat but still easy enough for a weekend afternoon in your own kitchen, these mini fruit tarts with pastry cream are about to hit the spot. I swear, the first time I brought a tray of these to a family brunch, everyone hovered over them before dessert was even on the table. The buttery tart shells, that rich, silky custard tucked inside, and the pop of fresh berries—it’s a combo that tastes as stunning as it looks.
Don’t get intimidated by the “pastry cream” part. If you’ve ever made pudding from scratch, this is absolutely doable—and the results? Totally leaps and bounds above anything store-bought. Each little tart is basically a bite-sized sunshine party, perfect for showing off in spring, but honestly, irresistible all year long.
Why You’ll Love These Mini Fruit Tarts
If you’re searching for a show-stopping dessert that’s easy to eat, easy to share, and honestly feels a bit fancy, mini fruit tarts with pastry cream should be your go-to. There’s something so cheerful about those glossy berries piled on creamy custard, all nestled in a tender, buttery crust.
They hit that perfect balance of crisp, creamy, and juicy in every bite. The shell holds up just enough to give a satisfying snap but never overpowers the vanilla pastry cream, which melts into the fruit. Whether you want to impress at a party or just enjoy a treat with your afternoon coffee, these are a total crowd-pleaser. Plus, any excuse to use seasonal fruit—yes, please!
Mini Fruit Tarts With Pastry Cream: Ingredient Guide
Let’s break down what makes these mini fruit tartlets so special, ingredient by ingredient:
- butter: gives richness and that signature melt-in-your-mouth pastry texture.
- Eggs and egg yolks: help bind the dough, add richness to the custard, and give that dreamy custard yellow.
- Vanilla extract: brings a warm, aromatic sweetness that ties the tart together.
- Powdered sugar: softens the tart shell and adds a delicate sweetness without any graininess.
- Kosher salt: just a pinch sharpens all the other flavors and keeps things from getting flat.
- Flour: forms the backbone of the tart shell, making it crisp yet tender.
- Milk: creates a creamy base for the pastry cream.
- Granulated sugar: sweetens the pastry cream perfectly, balancing the tart shell and topping.
- Cornstarch: thickens the custard, making it smooth and luxurious without being heavy.
- Strawberries and blueberries: add bursts of tartness and vibrant color, but you can use almost any fresh fruit.
- Apricot jam: brings shine and a subtle glaze to the fresh fruit topping.
- Water: helps loosen the jam for glazing.
See the recipe card below for the full list of ingredients and measurements.
Swapping Ingredients: Fruit Tart Flexibility
If you’re missing something or need to adjust for dietary needs, these mini fruit tarts are wonderfully flexible. Need a gluten-free option? Try your favorite GF flour blend in the pastry shell (just watch the texture and maybe add a touch more binding). Dairy-free folks can swap in oat milk or almond milk for the pastry cream, and even a plant-based butter substitute will work in a pinch.
Don’t have strawberries or blueberries? Go for raspberries, kiwi, peach slices, blackberries, or even little segments of mandarin orange for color and tang. The glaze can be made with any light jam—think apple or even a bit of honey if you’re out of apricot.
How to Make Mini Fruit Tarts With Pastry Cream
Making these mini fruit tarts with pastry cream is actually pretty fun and hands-on—you’ll get a big payoff with each step. Here’s how the process usually plays out in my kitchen:
- Whip up the tart dough by mixing flour, powdered sugar, and salt. Then work in the cold butter until you get those little pea-sized bits that promise a flaky crust. You can use a food processor, but mixing by hand works just fine—just make sure your hands are cool so the butter stays cold.
- Add eggs and a splash of vanilla. Gently bring the dough together into a mound, careful not to overmix. It doesn’t need to be perfect, just smooth enough to hold together.
- Chill your dough plenty. This step is key for that beautiful, shortbread-style snap. Once it’s rested, roll it out on a floured counter and cut rounds to fill your mini tart pans.
- Line your tins with pastry. Press gently into all the nooks, trimming away any extra. Prick the bottoms with a fork to keep things from puffing up too much, then pop them in the freezer for a bit—this really locks in that crispness.
- Bake the shells until golden and crisp. Let them cool on a rack while you prep the custard—it’s hard not to sneak a taste of that crumbly shell.
- For the pastry cream, warm milk and vanilla just to a simmer. Meanwhile, blend sugar and cornstarch, then whisk in the egg yolks for a smooth base.
- Temper the yolks. Gradually add a bit of your hot milk to the yolk mixture, whisking constantly so nothing scrambles. Then pour everything back into the rest of the milk and stir slowly over heat until you see it thicken into a glossy, smooth custard.
- Cover the pastry cream tightly and chill until set and cool—patience is worth it here. If you like, give it a little whisk before piping so it’s silkier.
- Assembly time! Pipe or spoon the custard into each shell. Top with sliced or whole berries, arranging them in joyful, colorful patterns. If you want that pastry-shop gloss, brush your fruit with a bit of melted apricot jam for shine.
By the time you’re done, you’ll have stunning bite-sized tarts that taste like they came straight from a French patisserie.
Foolproof Tips for Mini Fruit Tarts
Getting the best result from your mini fruit tarts with pastry cream just takes a few smart tricks and shortcuts that bakers rely on. Always keep your butter and dough cold until baking—a chilled dough equals superior flakiness. When rolling out the shell pastry, lightly flour your rolling pin and surface to keep things from sticking.
For extra-smooth pastry cream, strain your custard through a fine mesh sieve before chilling. If time is tight, make the tart shells or pastry cream a day ahead and assemble just before serving. This helps keep the crust crisp and the fruit fresh.
After assembling, these tarts are best the day they’re made, but you can store them in the fridge if needed. Just know the shell may soften a bit with time, especially if you’ve used very juicy fruit.
Pairings & Variations to Make These Tarts Your Own
Mini fruit tarts are basically a dessert canvas. If you want to serve them for brunch, they go beautifully alongside coffee or a fruity herbal tea. For a party spread, pair with lemonade, sparkling wine, or a soft, floral white like Moscato.
To vary up the flavor, try swapping the vanilla in your pastry cream for a splash of almond extract, orange blossom water, or lemon zest. Mix up your fruit choices—cherries, mango, pomegranate seeds, or edible flowers can transform the tarts for any season.
Love a bit of crunch? Sprinkle a few toasted hazelnuts or pistachios on top, or even a dusting of shaved dark chocolate. For a make-ahead trick, prep shells and cream a day or two before, then just fill and top right before you’re ready to eat.
FAQs about Mini Fruit Tarts With Pastry Cream
Can you make mini fruit tarts ahead of time?
Yes, you can make the tart shells and pastry cream a day or two in advance. Assemble with fresh fruit right before serving to keep the crust crisp and the fruit bright.
What’s the best way to keep the crust from getting soggy?
To prevent a soggy crust, let both the tart shells and pastry cream cool completely before assembling. Adding your fruit at the last minute helps, too.
Can these mini fruit tarts be frozen?
You can freeze the baked tart shells and even the pastry cream separately. Freezing assembled fruit tarts isn’t recommended since the fruit loses texture and the shells soften.
What other fruits work well on these tarts?
Many fresh fruits can top mini fruit tarts—raspberries, blackberries, kiwi, mango, grapes, and even citrus segments all deliver flavor and color. Just make sure fruits are dry before layering them on.
Final Thoughts on Mini Fruit Tarts With Pastry Cream
There’s just something uplifting about a tray of mini fruit tarts with pastry cream—each one is a tiny promise of happiness, with its buttery crunch, satiny custard, and burst of fresh fruit. They’re surprisingly simple, totally satisfying, and a sweet way to turn an everyday gathering into something memorable.
If you’re looking for a dessert that wows without stress, these little beauties deserve a spot in your regular rotation. Happy baking and even happier sharing!
More Delicious Recipes
- Mini Chocolate Tarts: If you love the idea of mini tarts, these chocolate versions offer a rich and indulgent twist perfect for any dessert table.
- St. Joseph’s Pastries: These pastries feature a delightful filling and a flaky crust, making them a charming option alongside fruit tarts.
- Italian Pastry Cream: The perfect companion for your tarts, this pastry cream recipe will elevate any dessert with its richness and depth of flavor.

Mini Fruit Tarts With Pastry Cream
Equipment
- food processor
- Rolling Pin
- mixing bowl
- cookie cutter
- mini tart pans
- Saucepan
- piping bag
Ingredients
Ingredients
- 1/2 cup Butter (unsalted, cold)
- 1 Egg
- 1/2 tsp Vanilla extract
- 1/2 cup Powder sugar
- 1/4 tsp Kosher salt
- 2 cups Flour
- 1 3/4 cups Milk
- 2 tsp Vanilla extract
- 5 Egg yolks
- 1/4 tsp Kosher salt
- 1/2 cup Granulated sugar
- 3 tbsp Cornstarch
- Strawberries
- Blueberries
- 1 tbsp Apricot jam
- 1/2 tsp Water
Instructions
Instructions
- Start by making the tart dough. In a food processor, add the flour, powdered sugar, and salt, and mix until combined.
- Add the cold cubed butter, and blend until there are pea-sized pieces of butter. If you don't have a food processor, you can do it by hand, mixing the cold butter into the flour mixture. Make sure that your hands are cold.
- Then, add the egg, and the vanilla extract and mix until a dough forms. Try not to overmix the dough.
- Cover the dough with plastic wrap and let it chill in the fridge for at least an hour.
- Transfer the dough onto a clean floured surface and roll it with a rolling pin into a rectangle.
- Use a cookie cutter or a round bowl (1 inch larger than the mini tart pans) and cut small rounds of the pastry.
- Place the pastry inside the mini tart pans and press it down using your clean hands.
- Cut off the extra edges. Make holes in the bottom of the pan with a fork and place them in the freezer for at least 20 minutes.
- Bake in a 180c (350f) preheated oven for about 15-20 minutes or until the crust is a light golden brown color. Remove from the oven and let it cool while making the filling.